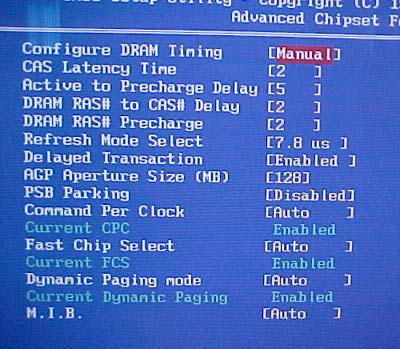
To access the Advanced Chipset Features you
must first press Ctrl + F1 to unlock this menu.

Once inside we have all the
usual memory tweaks we'd expect from a high performance motherboard. CAS
Latency, RAS to CAS Delay and even RAS Precharge. There are also a few Intel
only memory tweaks like CPC, Fast Chip Select and Dynamic Paging Mode. M.I.B. is
Gigabyte's name for PAT and it is possible to turn Performance Accelerating
Technology on.

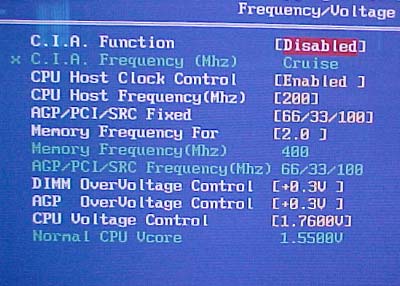
CIA (CPU Intelligent Accelerator) is Gigabyte's automatic overclocking function... but
who turns that thing on? ;-) It takes the fun away from overclocking
IMHO.
You
can adjust the FSB from 200-355 MHz in 1 MHz increments while keeping the AGP/PCI/SRC
(Serial ATA) frequencies locked with the options on the screen above.
There are the usual 1:1, 5:4 and 3:2 memory dividers and here are the voltage
options. 2.8V max VDIMM, 1.8V max AGP and 1.76V maximum CPU voltage. Not the
highest voltages we've seen but it should be good enough for the novice/average
overclocker.
Riding along at
225MHz....
Gigabyte build their motherboards
for mainstream users, so overclocking is more of an added bonus. Keeping that in mind
we didn't really have too high of an expectation for the GA-8IPE1000
Pro2-W. Starting at 200 MHz FSB I slowly started to raise the speed a few MHz at a time.
At 213 MHz we had to increase the DIMM voltage to 2.7V to stabilize things.
At 220 MHz we started to experience problems again and had to up the CPU voltage
to 1.6V.
In the end, I maxed out with a speed of
225 MHz FSB, not bad considering we're using a P4 3.0C that's not very
overclockable.
