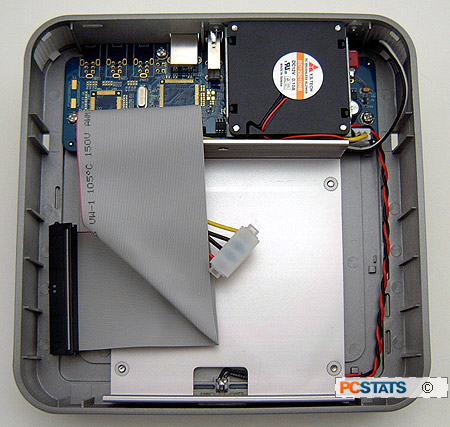
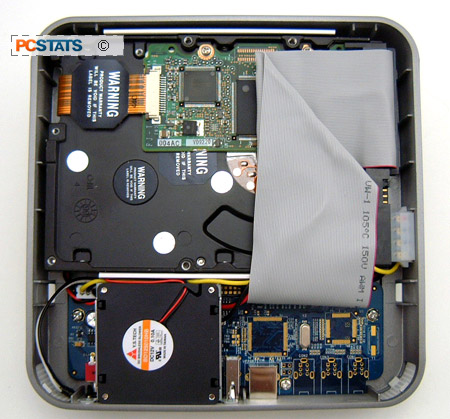
The aluminum heatsink needs to be removed from the NexStar GX first of course
for installation to proceed. The 3.5" IDE drive is screwed into the heatsink
from the sides which are inaccessible with it still in the chassis.
Once the drive is set into the heatsink, and the heatsink set into the
chassis, the hard drive power and 80-pin IDE cables are hooked up. There is
plenty of length in both cables, so you shouldn't have a difficult time plugging
in all the wires. It doesn't really matter if the drive is set to slave or
master, but it should not be left on cable select (CS).

With that done, the heatsink and hard drive are screwed back into
the chassis. The last step is to position the internal thermistor somewhere
on the drive body (not on the circuit board), and tape it down with the included
strip of Kapton tape. This sensor is what tells the internal NexStar GX fan to
turn on or turn off, depending on the temperature of the hard drive.

Last but not least, install the top cover and connect up the NexStar GX DC
power and USB 2.0 data cables. Simple, and it only took a few minutes to do with
nothing more than a hard drive and phillips screw driver. When the unit is first
powered on, it may be necessary to initialize and partition the hard drive if it
is brand new. For an in-depth explanation of how to do that, see PCSTATS guide
on the subject. Also, in WindowsXP don't forget to "Unplug or
Eject Hardware" when you want to unplug the NexStar GX device from the PC. It's
a good habit to get into with any USB device, and since hard drives are a
little more fragile to bad writes than a USB flash drive, it will probably save
you some headaches later on.
Sound and Cooling Fans
To enhance the Vantec NexStar GX's cooling ability, the
unit has a small 12V YS Tech BD125010HB squirrel cage fan which can move about
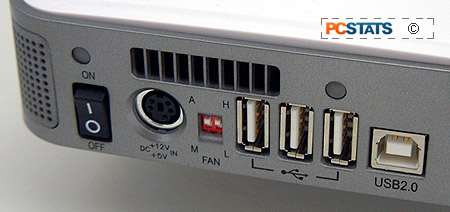
3.6 CFM of air. During operation, the fan was not audible. By using the DIP switch on the back of the unit, we can set the fan to run in one of three modes; automatic, manual low and manual high. The effect of choosing the manual settings should be quite obvious, whereas automatic works with the NexStar GX's internal thermistor. When that thermistor which you tapped down onto the hard drive is too hot, the fan will automatically run faster
 Cables and Connectors
The only direct control the user needs for the Vantec NexStar GX is a power button, and that is located on the rear of the unit. We also find the DC 12/5V power socket (AC100-240, 50-60Hz power brick), the fan controls, three USB 2.0 ports, one USB 2.0 B port (dedicated, connects HDD to the computer) and a Kensington Secure Lock.
The Kensington Lock receptacle allows users with the neccessary Kensington lock cable to secure the hard drive from easily walking off. To be realistic, it doesn't prevent a would-be thief from popping off the plastic top and unscrewing the hard drive from the plastic chassis... The User's Manual which comes with the NexStar GX is very good and should be able to guide users through installation steps if there are any problems.
To conserve energy, when the Vantec NexStar GX does not detect a signal
through the USB cable (when the NexStar GX is not connected to a computer),
it automatically powers itself down. This saves energy and allows the NexStar GX
to be moved from computer to computer without exposing the hard drive to
potential damage because its platters are still spinning around at full speed.
Let's take a look at some quick benchmarks, and don't miss the Experts Tip a
little later on.
