|
The display is so thin that it at first appears as though a notebook has mistakenly been left in the carton.
81% Rating: 
|
|
|
|
Home >
Reviews >
Monitors >
Samsung 152T |
|
|
More views of the displays
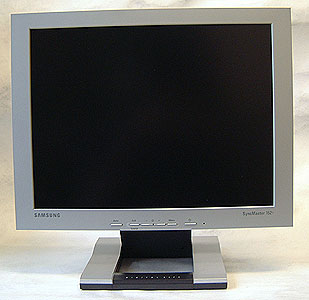
The bezel around the
display should be as clean as possible of buttons, logos, and other things so there are as few
distractions as possible. The Samsung 152T scores very well in this regard, and still
leaves enough space for the odd Post-It note or two.
The Auto adjust button is
one touch away, and with no wires dangling below the
screen, adjustments, and the look of the entire unit is very simplified. There is an abundance
of backwards tilting, but only about 5 degrees tilt forward. Set up of the display is utterly simple
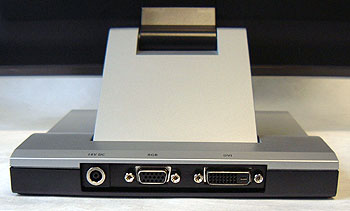
as all three cable plug directly into the rear of the base (no flipping the monitor precariously
upside down to get access to those hard to reach ports!).

The only bad side to these cable ports can occur when the monitor is mounted to the wall
with its 75mm VESA mounting points. Instead of the cables draping down nicely, they base of the 152T folds
in such a way that they point upward. The wires are positioned low enough
that they shouldn't pop up over the top of the display however.
|
 |
 |
|
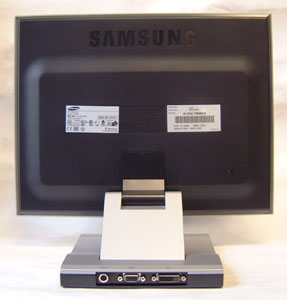
The face of the 152T is clean as is the rear
of the
unit. There are no ventilation holes in the rear which is an interesting change from normal conventions.
Perhaps Samsung are using laptop LCD technology, or backlights which generate less heat so these vents are
not necessary. At the lower right hand corner of the
base is an integrated Kensington lock for anti-theft purposes.
|
|
There are
a whole wack of ways to position the display, tilt it forwards, or raise or collapse the base. The basic
side profile is shown, and next to it the 152T with the 75mm VESA mounting plate installed. The base squishes together and the screws from the mounting arm
hold the base together. In that state (shown half-collapsed here) the entire unit is less than 2" thick which is fairly
remarkable.
152T OSD Menu:
 Samsung continue
with their updated OSD which is layed out nicely and
easy to navigate. T o adjust an LCD display it is usually much easier
to simply push the all-in-one "Auto Adjust" button on the front panel. Doing that
will cause the unit to quickly run through a short list of adjustments in
about 5 seconds and properly adjust the display to its ideal settings. Samsung continue
with their updated OSD which is layed out nicely and
easy to navigate. T o adjust an LCD display it is usually much easier
to simply push the all-in-one "Auto Adjust" button on the front panel. Doing that
will cause the unit to quickly run through a short list of adjustments in
about 5 seconds and properly adjust the display to its ideal settings.
Note that this is only necessary if you are connecting the LCD display by
the analog cable. If you hook it up by the DVI digital cable you'll
notice that the auto adjust key is locked out, and unnecessary.
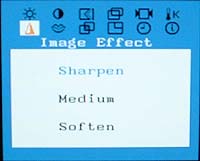
The menu includes the following options:
Brightness; Contrast; Image Lock: Coarse, Fine; Position: H/V; Color Control:
Red, Green, Blue; Color Reset: Geometry, Color; Image Size: Normal, Expand 1
&2; Image Effect: Scaling on/off, Filtering; Language: English, German,
Spanish, French, Italian, Swedish; OSD Position: H/V; OSD Display Time: 5, 10,
20, 200 seconds; and Display Mode: Hl/V Frequency & Resolution. Power,
Brightness (+Up -Down), Auto Adjust, Menu, Video Select & Video Indicator
(15-Pin D-Sub or DVI-D)
|
