Heatsink Clearances and Overclocking
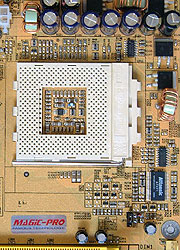
It's a shame that the four mounting
holes are gone because Magic-Pro did an excellent job at clearing the CPU socket
of obstructions.
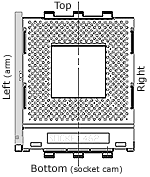
| pcstats
heatsink clearance measurements |
| top clearance: |
14 mm |
| bottom (cam) clearance: |
11 mm |
|
| left side (arm) clearance: |
25 mm |
| right side clearance |
17 mm |
|
| socket mounting holes: |
n/a |
| max. heatsink base dimensions: |
~86x76 mm |
|
 Note: Approx.
measurements are made from the edge of the socket (not the clips) to
the closest obstacle taller than the ZIF socket
itself. Note: Approx.
measurements are made from the edge of the socket (not the clips) to
the closest obstacle taller than the ZIF socket
itself.
The socket is 51mm across, and 62mm from
top to bottom. | |
 |
Installation of larger heatsinks like the Thermalright
SLK-800 or Vantec AeroFlow is possible. It's
a shame the mounting holes are gone.
 Overclocking the
MP-K7N Ultra S:
Because the Magic-Pro K7N-Ultra S is a budget motherboard we didn't really
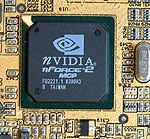
know what to expect from the board. Taking a peek at the Northbridge I noticed
that the K7N-Ultra S was using the C1 based nForce2 SPP Northbridge; these chips are
supposed to be known for hitting very high FSB's easily.
Dropping the multiplier to 8x, I began to raise the
FSB. 200 MHz came and went easily but at 205 MHz FSB we began to run
into a few problems.
I had to raise the voltage to my memory to 2.7V as well as the nForce2
Northbridge to 1.7V to stabilize things. Unfortunately the overclocking
adventure was cut short at 211 MHz FSB. Raising the voltage to the memory to
2.8V didn't help, nor did raising the VDD voltage.
While this is not the fastest I have ever gone 211 MHz FSB, for a budget motherboard
the results are pretty good. On a side note, it seems like the 1.8V VDD option
doesn't work since even at stock speeds when the Northbridge is given 1.8V, the
board fails to boot.
