Now that your motherboard is ready for installation, prepare the case.
Remove any wires that may be obstructing the area where the board will be
attached.
It's time to test how the new board will fit. Lower the
board gently into the bottom of the case. First check to see if the risers (metal screw attachments that give the motherboard separation from the body of the
case) are in the right configuration for the screw holes on your new motherboard. It's
not essential that every screw hole on the board should be matched to
a riser in the case, but it's a good idea. Move or
add any necessary risers. If you do not have any extra, any local computer store
will be able to provide them. If there are extra risers which do not
line up with screw holes, remove them first, they will probably cause an electrical
short if you don't.
Now we need to find out whether you must replace the I/O shield at the back
of your case. This is the metal bracket which frames your motherboard's
external ports and connectors like USB ports, mouse and keyboard plugs,
etc.
Attempt to slot the board into place. If it fits snugly and all the
connectors at the edge of the motherboard have a corresponding hole in the I/O
bracket, you're fine.
If some of the connectors do not have an appropriate hole for them in
the case, you will need to replace the bracket.
Every new motherboard should come with an I/O bracket included. To remove
the old bracket, apply force to the outside of the bracket (with the motherboard
removed) to pop it out. Some cases may have the bracket actually attached
to the body of the case with thin metal joiners. In this situation you
will need to give the bracket a good whack with the back of a screwdriver to
break some of the joiners before you can twist it loose. Pop the new
bracket into place and make sure the motherboard fits correctly.
Now that the motherboard is fitted in, screw the motherboard to the risers to
secure it in place.
Now plug in your video card (if necessary) and other expansion cards.
Reconnect all cables, and take some time to ensure that everything is installed
correctly. Here's a quick checklist:
1. ATX power cable from power supply plugged in
2.
Heatsink fan power cord plugged in.
3. No cables obstructing heatsink
fan
4. IDE cables for drives plugged into the correct ports.
5. Case
connectors for power switch, reset, LEDs, etc. plugged in properly. Consult your
motherboard manual for the correct configuration.
6. Video card seated
properly in AGP slot
7. Audio cable for CD drive plugged into soundcard or
board (if necessary
8. Mouse, keyboard, video and network cables connected at the back.
Now boot your system for the
first time with the new board. You may be prompted to enter the BIOS setup
screen, depending on the make of your motherboard. This can be accomplished by
pressing 'DEL' immediately after booting the computer. The BIOS setup screen
will appear shortly. If your new motherboard comes with integrated peripherals such as sound, video or network capabilities,
but you do not wish to use these devices, disable them in the BIOS
setup.
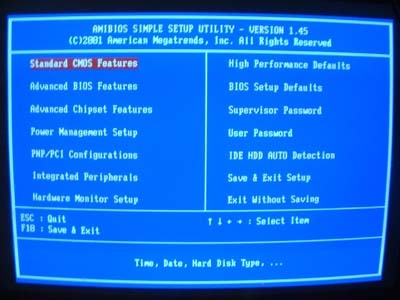
Navigate to the
'integrated peripherals' section of the BIOS, locate the devices you want to
disable and set them to 'disabled' (generally this is accomplished by
highlighting the item and pressing 'ENTER' to change its state.
Instructions will be available on the BIOS screen).
Once everything is setup to your liking, it's time to proceed to the second
part of this article, the '...without breaking Windows' part.