So now you know how to gather and read your choice of RSS
feeds from the Internet, but what if you have your own website? How do you go
about creating one of these feeds so that interested readers can track your
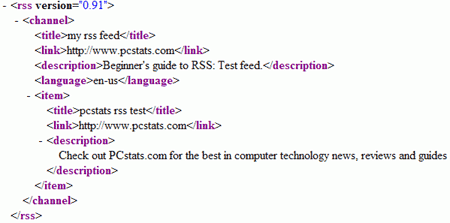
articles and updates? Creating them from scratch is not really that difficult, as you can
see from the simple example we included above, but first let's look for ways to
automate the process.
We're going to use a free Internet tool to
create your first RSS feed file which you can then host on your website and
update at will.
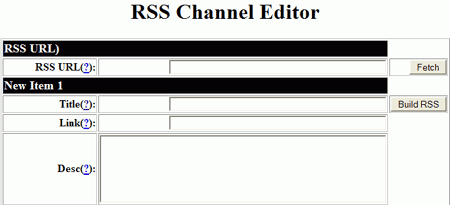
The RSS
Channel Editor
is a RSS feed creation tool which automatically creates workable RSS 0.91 files
from the data you enter, making it a great place to start.

Creating an RSS feed with the RSS Channel
Editor
To create an RSS feed with this tool, you have to fill in the basic
sections: Channel title, channel link and channel description along with
at least one item including title link and description.
The channel title, link and description entries provide the name of your
feed, its web location and a (optional) description of the feed.
Each separate item on your RSS feed needs to have an item title and link and possibly a description too.
Let's try it out:
Open the RSS Channel Editor and scroll down to the 'channel summary'
section.
Enter a title, link and description for your feed. The link is
generally used to connect to the main page of your site, so set it
accordingly.

Now scroll down to 'item1'.
Enter a title, link and description for your first RSS feed item. This could
be something new on your site, or a link to another interesting site.
Once you've done that, you can add a few more items (up to 15 at a time) if
you like. When you've finished adding items, click the 'build RSS' button
next to the last item you filled in.

A page of XML will pop up. Copy all the text in the main window, open a blank notepad document and paste the text in. Save
your new file as rsstest.rss or something similar.

