PCstats Upgrade Guides: Hard Drive
installation
 With hard drives priced
at an all time low, and programs gobbling up more and more disk space there
has never been a better time to add in some extra storage. After all, growing
a good MP3 collection often means that within a short while we
find ourselves running out of HDD space! By the way, HDD is the
short form we techies use to quickly write Hard Disk
Drive.
Most new computers these days
have at least 40GB worth of hard drive space standard; if you have less then 20GB
your hard drive is really too small. Luckily for you this is easily fixible since
most computers have room for additional hard drives, and upgrading or adding additional drives is easy once
you know how.
So what do you do when you are running out of hard
drive space?
The answer to this question totally depends on what type
of computer system you have, and specifically how old it is. Most computers that
are Pentium II 333 MHz will hit a 8.4 GB hard drive limit and even if you install
a 80GB drive into the system, it will only access that drive up to 8.4 GB. It's a
simple BIOS limitation that unfortunately most of the time isn't fixable with a BIOS flash. Not all
is lost as the hard drive manufacturers have taken it upon themselves to solve this problem.
If you do have this problem, simply visit their website and download the software
which will allow you to access more then 8.4 GB.
The next
limitation which usually affects computers older than Pentium II 350, till those of the
Pentium III 500 MHz era is the 30GB limit. Like the 8.4 GB limit, this limit
is a BIOS problem which is easily fixed with a BIOS update. Simply flash your BIOS with
the latest version for your motherboard and you're set. Are we in the clear now? Well
no, there is yet one more HDD size limit at 137GB. You probably won't have to
worry about that one for a while, but it's nice to know that if your motherboard
is affected, a simple BIOS flash is all you need to resolve the
problem.
Setting up a new hard drive in your current
computer
The hard drive we're going
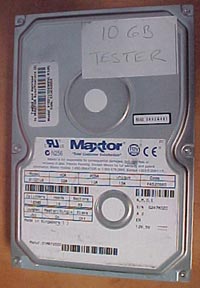
to use for demonstration purposes is an older model, a 10GB
DiamondMax 5400RPM Ultra/66. It's really old in todays 60GB world, but the process to install it is
still the same, and it still works well enough!


The first thing you want to do is set your jumpers
correctly. Looking at the back of the HDD, you should see one or more little
plastic jumpers. Somewhere on the HDD label you should see some jumper settings (they will tell
you where to put the jumper to set the parameter), this is usually located on
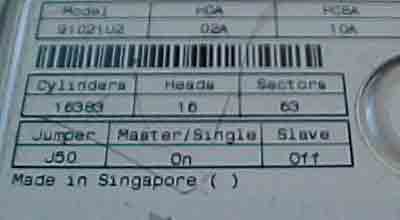
the top of the drive. As we can see on our 10GB Maxtor DiamondMax jumper 50
controls the Master/Slave settings. In our case, this drive is going to be a slave drive so
we're going to remove jumper 50 to make it slave.
The three options
you have to choose from are Master, Slave and Cable Select (CS). You cannot have
two drives on the same setting attached to the same IDE cable - if you do, your
computer will not start because it cannot tell which of the drives to
use.

