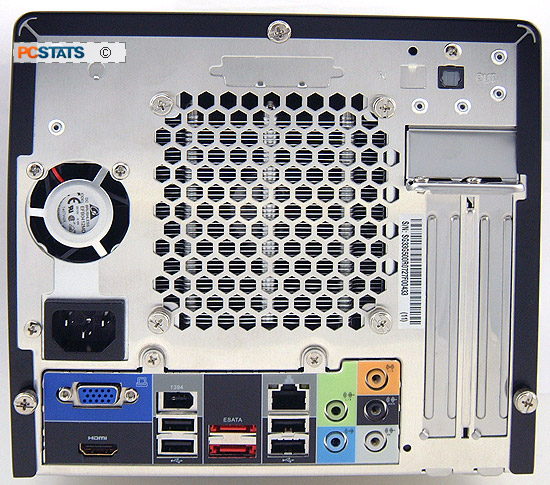
Starting from the left we
find a 40mm PSU fan, the main power connector, the 15 pin analog display
port and the HDMI port. In the middle is a honeycomb grill for the CPU fan exhaust,
below that is a IEEE 1394a port, four USB ports, two eSATA ports, a Gigabit
networking connection and the 7.1 channel audio connectors.

At
the top right hand corner you'll find an optical SPDIF audio output and below
that are the PCI/PCI Express expansion slots. To the right of the grey audio socket is the
Clear CMOS button. It's not identified but it's there in case you need to reset
the BIOS without having to open the case.
To get into the Shuttle XPC SG33G50, just undo the three thumb screws at
the back, slide the aluminum cover back about 2 cm and then lift it off. Once the outer
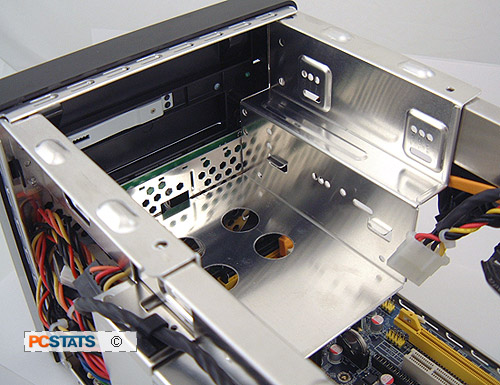
shell has been removed, you'll be greeted by a drive cage. To remove it, undo
two screws which attach the cage to the chassis and it will slide out nice and
easy.
 \
\
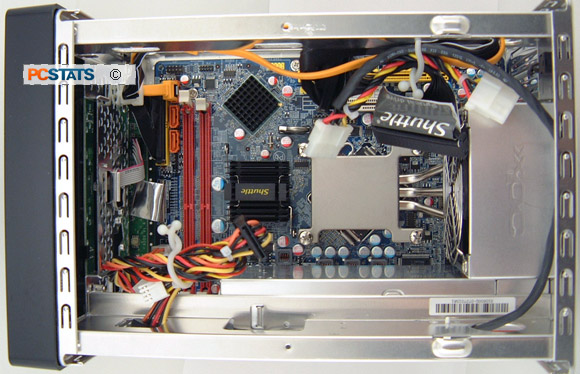
Once the drive cage has been removed, the motherboard is
fully exposed and you can install the Intel LGA775 processor, heatsink, and memory easier.
Thanks to Shuttle's excellent internal chassis design, both the CPU and memory can technically be
installed with the drive cage in place, it's just easier when it's removed
(and it can be pulled out with all the drives still in place).

Once the
drive cage has been removed, the motherboard is fully exposed. Starting from the top
left hand corner there are three internal Serial ATA ports, one IDE port,
the two red DDR2 memory slots, and the Serial ATA/floppy power connectors.

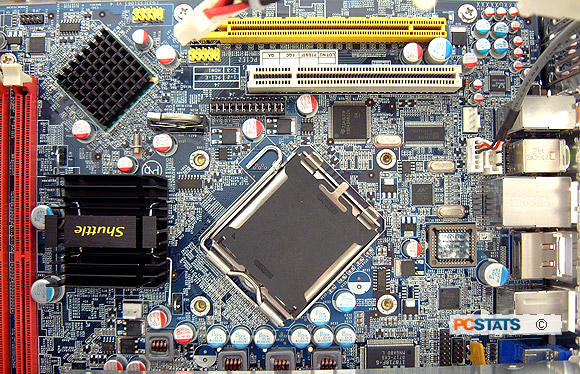
Shuttle covers the Intel G33 Express chipset with a medium
sized passive aluminum heatsink and the ICH9DH with a smaller passive cooler. To the
right of the Intel G33 Express chipset is the LGA775 Intel CPU socket.
In the picture above it is covered by the custom Shuttle thermal solution.
