There comes
a point in every notebooks' lifespan when it's time to upgrade the memory.
However, the more compact the notebook, the more challenging it becomes for
manufacturers to place every expansion slot on the bottom of computer where they
are easily accessible. With sub-notebooks in particular, this leads to
expansion ports getting tucked away in areas the
end user is never meant to see...
With a little guidance from a Service
Manual and equal measure of care, it's possible to perform notebook surgery and
upgrade, the inaccessible!
The focus of
today's PCSTATS DIY Guide
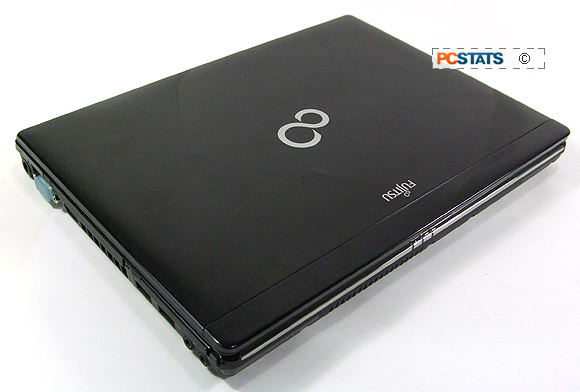
is the Fujitsu Lifebook P770; a
performance notebook built around the Intel Core i7-640UM processor, Intel QS57 Express chipset
and anywhere between 2GB to 8GB of DDR3 memory. Depending on the OS (32-bit or
64-bit), this versatile magnesium chassis notebook might need a little more RAM to
really get by. PCSTATS is going to outline the steps to upgrade
the P770's memory and tell you how to access its hidden memory
slot.
The Fujitsu Lifebook P770 notebook
has two 204-pin SODIMM memory slots (full specs: Fujitsu's website ), one user accessible
slot at the base of the computer and a second slot hidden behind the keyboard.
Depending on the initial memory configuration, you might want to move memory models
around or populate both SODIMM slots with higher density RAM. Getting at the hidden
memory slot is not covered by the User Manual, but the process isn't too
difficult.
|

Fujitsu
Lifebook P770 notebook
|
TIP - The basic steps outlined in this DIY Guide
are applicable to upgrading memory on just about any
notebook.

Step 1.)
Find the Service Manual
The easiest
way to upgrade the memory in a laptop is via the SODIMM memory slot located on the bottom of the
computer, behind two screws and a small aluminum panel. The Fujitsu P770 spec sheet lists
two DIMM slots, but only one is talked about in the User Manual. The trick
to finding the other memory slot is locating a "Service Manual".
Service Manuals exist for most major computer devices, from notebooks to office level
printers and such. These documents are typically not available to the
public on the manufacturers website, so finding the PDF can be a bit of a
challenge. The best advice we can offer is to search Google: query "brand"
+ "model-number" + "service manual" and see if that returns any hits. Obviously, replace "brand" and "model number" with the
correct info, in this example; "Fujitsu P770 Service Manual".
PCSTATS was
able to track down the Service Manual for the Fujistu P770 notebook online, using
that document we found the second memory slot's location behind the keyboard. It
provided only a rough idea of how to get at the slot, so we'll break down those
steps in a moment.
Step 2.) What kind of memory do you
need?
The next
step is to figure out how much memory is
installed, how much more you'll be adding and of what type / speed
is required.
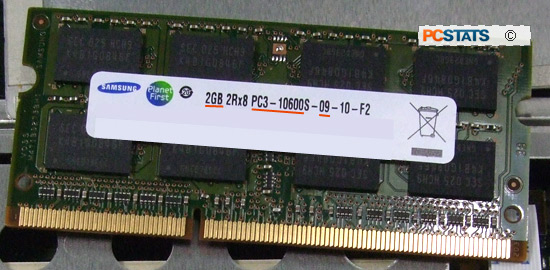
In this example, the Fujitsu P770 is equipped with two,
204-pin SODIMM DDR3 memory slots that can accommodate up to 4GB
density modules. One memory slot is populated with a stick of 2GB DDR3-1333
Samsung memory.
|

Reading the label on the installed Samsung memory tells us that
this is a 2GB module of PC3-10600 (DDR3-1333), at
CAS9.
|
A quick check of
the Memory Advisor tool on Crucial.com is the easiest way to reveal what memory options are available to your
notebook. In our case, the P770 can handle up to 2x4GB DDR3-1333
(8GB at a cost of $45), but since the notebook is
installed with a 32-bit OS, we opted for an additional 2GB DDR3-1333 module to bring total system
memory to 4GB.
|


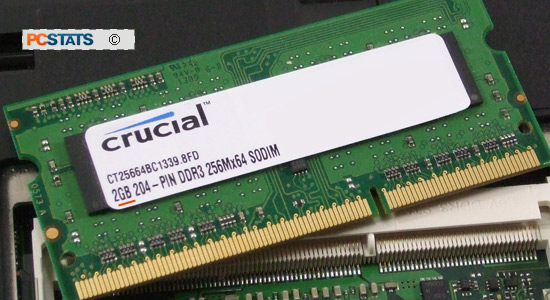
The upgrade memory from Crucial.com has identical specs; 2GB,
PC3-10600 ( DDR3-1333), CAS9.
|
Fujitsu shipped
this particular notebook with a 2GB PC3-10600 CAS9
module installed. Because we decided to add
memory we have to
purchase a memory module with matching speed and CAS values. This was
easily done on Crucial.com's website since all these details are listed. It
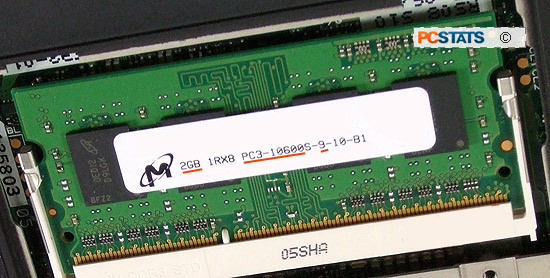
shouldn't matter that one module is made by Samsung, the other by
Crucial/Micron.
Generally speaking, it's always best with notebook memory
to match the modules exactly... a different CAS timing can cause havoc as can
mis-matched DDR3 speeds or densities. Next up, a step by step guide to
installing memory in the hidden memory slot.

