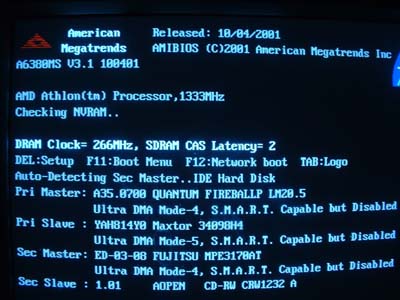
Once the processor and speed
information flash up onscreen as the computer begins to boot, it will begin to
enumerate the hard drives and other IDE devices connected to the computer. This
is known as the POST (or Power On Self Test) screen. Hit the 'pause key' when it
has reached 'secondary slave device.' Ideally the screen should look something
like this. You may have to reboot a couple of times to get it
right.

Note
that the CPU type and speed are clearly visible. Depending on
the manufacturer, the amount of RAM and the type and speed of it may or may
not be visible here.In this example, the amount of memory present
is not shown, but the speed of it is, 266Mhz DDR-SDRAM memory.
The Motherboard type and manufacturer is there, but
somewhat cryptic, the 'A6380MS' stands for Microstar - 6380 mainboard. This will
vary depending on the manufacturer of your board. The hard drives and other IDE
devices attached to the system are also clearly listed.
In this case, the system has all 4 IDE slots
filled. (Note: many modern mainboard manufacturers use splash screens to cover
this booting screen. Generally you can hit the Tab, F2, F10, or
ESC keys to get rid of the splash screen.)
Examining the BIOS Settings
The next step is to check the BIOS setting of your
mainboard. Locate the 'delete' or 'del' key on your keyboard. Restart the
computer.
As the POST screen described
previously comes up, press the 'del' key repeatedly. In a few seconds, you
should be taken to the mainboard's BIOS settings screen, where you can configure
the mainboard hardware.

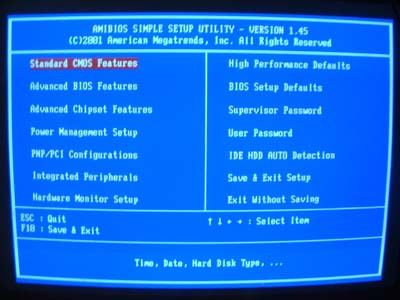
Above
is an example of the BIOS settings screen of a typical modern mainboard. Yours
may well look completely different, but will in general contain the same options. There are
many, many things that can be done here, but that will wait for another article. In
the mean time, we are concerned about finding as much information
as we can.

