Put your Windows XP x64 Edition CD into your drive and restart the system. At the prompt, press a key to
boot from the XP CD. The installer program will begin copying files from the
CD.
Note: Just as with Windows XP 32-bit, if you are installing WinXP x64 onto a
hard-drive that is not connected to a standard IDE port, for example a SATA
drive or IDE drive connected to a hardware RAID controller, you will need to
press F6 when prompted at the bottom of the screen, immediately after the blue '
windows setup' screen appears. After about 2 minutes, this will bring up a
dialog which allows you to install drivers for your SCSI or RAID device from a
floppy disk. Many computer motherboards have RAID controllers built into them,
so be aware that this may be a required step.
The 'welcome to setup' screen appears. Press enter to continue. View the
licensing agreement and hit F8 to continue.
Select the option to create a
new installation of Windows XP x64 Edition.

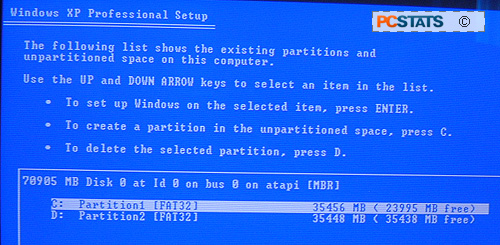
The initial screen shows the hard disks connected to
your system, and the existing partitions. Highlight the partition you
wish to use, or if you added a new drive, highlight the 'unpartitioned space'
under that drive's entry. If you are using a new hard disk and you want to
separate it into partitions, you can use the 'c' button to create partitions
now. Once you are finished, highlight your chosen partition and Hit ENTER
to begin.

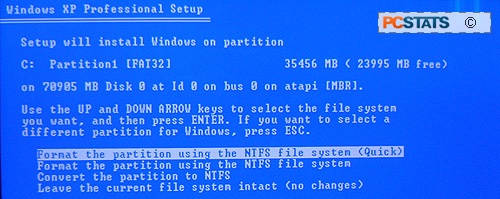
You will be prompted to format the drive with one of
four file systems: NTFS quick, FAT quick, NTFS, or FAT. In general, unless you
have a specific need for the FAT file system for compatibility, use NTFS. If you
are using a partition which already had data in it, you will get the option to
use the existing file system; choose this if you want to keep your existing data
on the partition. Windows will be installed into a \windows directory on that
drive, and a \program files directory will also be added (along with other
system folders like documents and settings and inetpub).

