Removing one of the operating systems comprising your
dual-boot installation is actually fairly easy, provided you remember one
essential fact: The files that XP uses to determine how many operating systems
are present and where they are located exist on the first partition of the first
drive (usually C:\, so formatting C:\ will wipe them out and mess up all Windows
installations. Note, the following instructions are only valid for Windows
XP or 2000.
Make sure you backup all essential data from the partition containing the
operating system you want to remove before you proceed further with this
section.
If you want to remove your Windows XP x64 Edition installation (for the sake
of this article we'll say it's located on your d: drive), the first thing you
should do is load up your 32-bit Windows XP version.

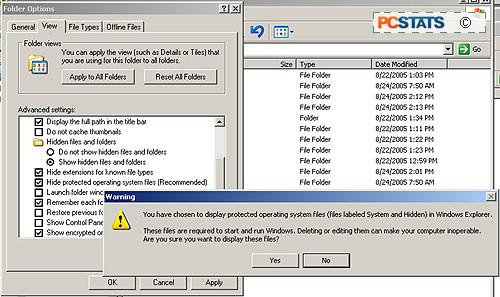
Open up your C:\ drive in an explorer window, and in the menu above, go to
'tools\folder options'. Choose the 'view' tab and ensure that the 'show
hidden files and folders' option is enabled and the 'hide protected operating
system files' option is disabled. Hit 'ok'.
In your C:\ drive, locate the 'boot' file and open it with notepad. It
should resemble the following:
[boot
loader]
timeout=30
default=multi(0)disk(0)rdisk(0)partition(2)\WINDOWS
[operating
systems]
multi(0)disk(0)rdisk(0)partition(1)\WINDOWS="Microsoft Windows XP
Professional" /fastdetect
multi(0)disk(0)rdisk(0)partition(2)\Windows="Microsoft Windows x64 "
/fastdetect

Make sure that the 'word wrap' option is unchecked by going to the 'format'
menu heading.
As we mentioned above, the BOOT.INI file is used by Windows to determine
which versions of the operating system are present on your computer and where on
its drives they can be found. By editing this file, you can remove all
references to XP x64, making it safe to format the operating system's partition
for reuse.

