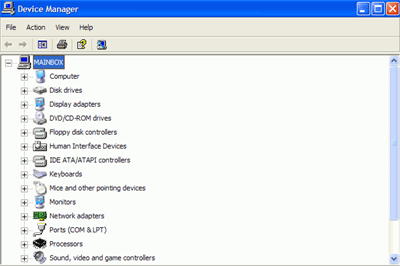
On this screen, there should
be no devices with yellow exclamation marks attached if you have installed all
drivers successfully. 
If there are exclamation marks, take note of the
device(s) that need drivers and obtain them from the manufacturer of your system
(or the maker of the specific device) via the Internet. You will also need to replace the patches and service packs that you applied previously to your Windows installation, as the repair install removes these. To do this, simply run windows update from 'start\all programs' once you have your Internet connection set up.
Once you
are fully up and running again,
you can reinstall your old hard drive onto the new system as a secondary drive
if you wish. Simply follow the drive install procedures we've already
outlined, then format the drive from Windows to use it for extra
storage.
Partitioning unused
space on your new hard drive
Both
freeware utilities featured
in this article share one characteristic. They do not partition or format
the extra space made available when you clone your Windows installation to
a larger drive. You can't use the extra space until it is partitioned and formatted
by WindowsXP, so it's only fair that we tell you how to do that too. :-)
Once you have successfully
cloned your drive right click 'My computer' and select 'manage' then 'disk
management.'
Your new
drive should be 'disk 0' in the bottom window. If you used HDClone or
Ranish Partition Manager
to
clone the drive, you should have an area of 'unallocated' space to the right of
your 'C:' drive area in the lower pane. Right click on this 'unallocated' space
and select 'new partition.'
This will bring up the
partition wizard. Click next a couple of times and you will be prompted for the
amount of disk space you wish to allocate to your new partition. Choose all of
it (the default) unless you wish to make several smaller partitions to organize
your files. You will be asked for a drive letter to assign the drive, and then
given the option to format it (which makes it available to Windows for use).
Accept the defaults for both of these options, click 'finish' and wait for your
new partition to be formatted.
The whole of your new disk is
now available for use. Alternately, you may wish to use a third party utility
like Partition Magic to append the extra space onto your 'c:' drive.
While the procedure is beyond the scope of this guide, sufficient
instructions can be found within the programs themselves.

