Note that for the purposes of hardware RAID 0 (striping) it is strongly
recommended that you use two disks of the exact same model. For mirror
(RAID 1) setups, this is not so essential, but the two drives should be of the
same capacity.
Attach the drives to the RAID controller, one drive per
channel, set as master for the best performance, and boot the computer. Note that
while you can attach both drives to a single IDE port on
your RAID controller, you will tend to get better performance with a pair of drives if
you plug one into each port during startup, the RAID controller drive detection and
setup screen will appear. With SATA hard drives, only one drive per port is
supported, so this isn't an issue.
Press <CTRL-H> or other key combination as
instructed to enter RAID setup.
For Promise RAID controllers
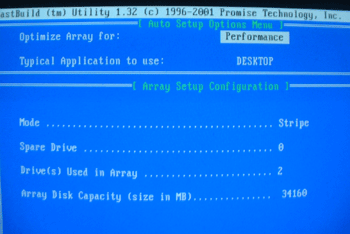
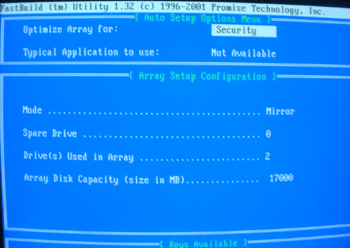
From the main menu, press '1' to enter Auto Setup. From
here, you can choose either a RAID 0 or 1 configuration, referred to in this
case as either 'performance' or 'security.' Note the separate drive configurations in the screen shots.


Choose and accept the desired RAID type. If you select a stripe (RAID
0) array, no further configuration is necessary. Accept the change and
reboot.
If you elect to setup a RAID 1 (mirror) configuration, you must then choose
whether you wish to simply create a mirror array (if you have two blank disks
and want them to be exact copies when adding data in the future), or create the
array and then copy the contents of one disk to the other (if you have a data
drive and you wish to create a mirror copy of it for redundancy).
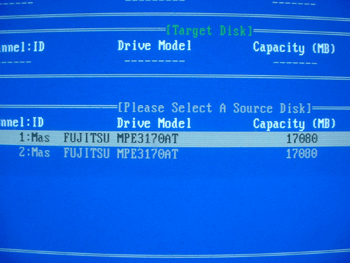
If you elect to mirror and copy data, you will be asked to choose a source
drive for the data.

BE CAREFUL.
Choosing the wrong drive here can be disastrous, so ensure that you know which drive is
which. Paying attention to which port you plugged each drive into should help
here, as they will be labeled on the motherboard or card. Once you have created
the array, reboot.

