Now enter a filename for the
file the video will be captured to, and a location on your hard disk. Click
OK.

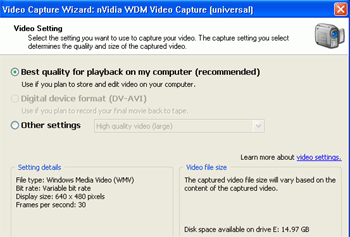
Now it's time to choose video
settings. These options affect the quality of the captured video, and how much
hard drive space it eats up. For now, leave it at the default 'best quality for
playback on my computer' setting. Hit OK.

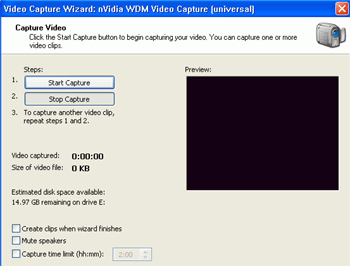
Finally we arrive at the
actual capture window. The preview window should show the video feed from your
VCR when you start it playing. If it does not, check your connections, and make
sure that you selected the right input method on the first screen.
Clear the 'create clips when
wizard finishes' checkbox unless you are interested in editing the video after
you capture it. When ready, press 'record' to begin capturing video to a
file.
The counters will tally up the
time you have been recording and the amount of disk space you have used. As you
can see, a minute of video eats up roughly 7MB of space on this setting. As
uncompressed video totals out at around 1GB per minute, this is not bad on
economy. When you have finished recording, click 'stop capture.'
Now double click 'my computer'
and navigate to the directory you set up to store the captured file. Double
click it to play it in Windows Media Player (or the player of your choice).
Watch the playback for
slowdowns or jerkiness, and see how you feel about the quality.
If the playback is fine but
you'd like the quality to be better, there is one option. Restart the capture
process from the main screen, but this time when you get to the video settings
screen, choose 'other settings' then 'video for local playback (2.1Mbps).' This
will give you the highest quality you can squeeze out of Windows Movie Maker.
The cost is that the files are about twice as large as the default setting
(about 15MB per minute).

