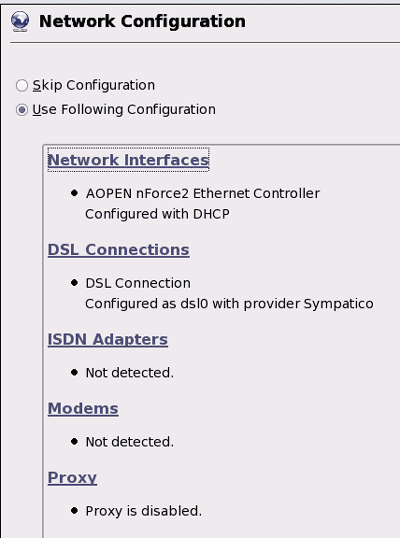
Any detected network adaptors on your
system will be listed here, and you can set their IP address and other
information now. By default, SUSE will set them to receive an IP address
by DHCP in the same way that Windows XP does, so if you didn't configure any
special settings for your network card in Windows, leave it alone here
too.

If you do want to change the settings, click on 'network adaptors' then the
'change' button.

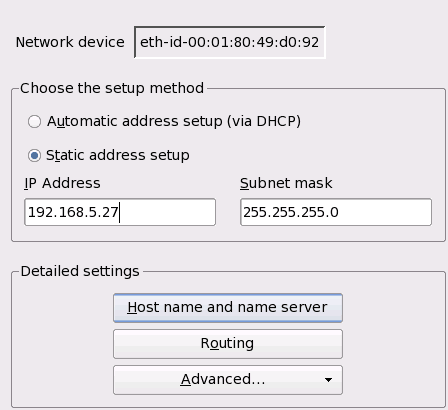
Click 'edit' to change settings for each adaptor. Enter an IP address
and subnet mask, then use the 'host and name server' and 'routing' buttons to
set DNS server info and default gateway respectively. Again, if you never
did this in Windows, don't worry about doing it here.
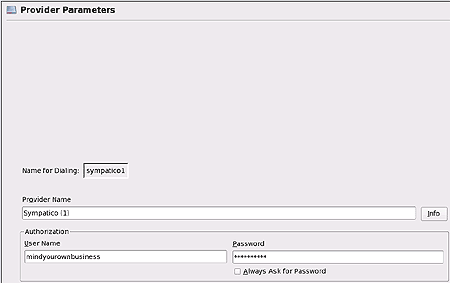
If you use a DSL connection, you'll want to enter the information for it now,
as given to you by your service provider. Click on 'DSL
connections'. If a connection to a DSL provider has been detected already,
it'll show up in the lower pane; click 'change' to enter your information for
this connection. Otherwise, click configure and choose your country and
DSL provider, followed by your password and username (as provided by your
ISP). Hit 'accept' when you are done. This will set SUSE up to dial
your DSL connection once you have finished the installation process.

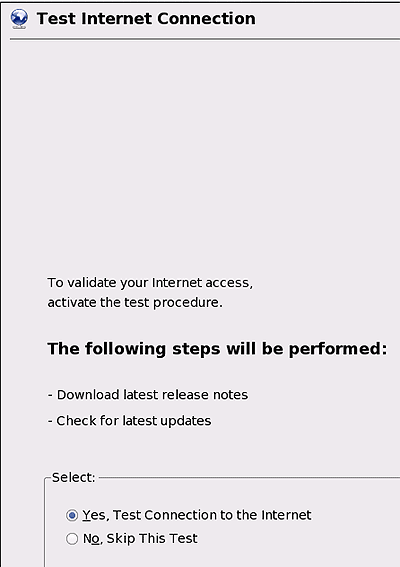
Now click 'next' to continue. The installation program will attempt to
connect to the Internet using your network and/or DSL settings, so that it can
download updates and patches to the operating system.

Hit 'yes' to test your Internet connection. If it's working, hit 'next'
to continue. If not, use the back button to return to the network settings
page and tweak your settings.

