The next item of information you'll need to know in order
to use this guide is what kind of hard drive you are dealing with. Is
it a traditional parallel ATA drive (also referred to as IDE) or a newer Serial ATA
(SATA) hard drive? As far as Windows is concerned, both types of hard
drive are identical, but their physical
installation needs differ. If you are planning on installing an additional hard drive, you need
to know which type you have before continuing; if you already know this, feel free to skip forward.
The simplest and most reliable way to determine whether
a hard drive is a Serial ATA or Parallel ATA device is look at the back of the
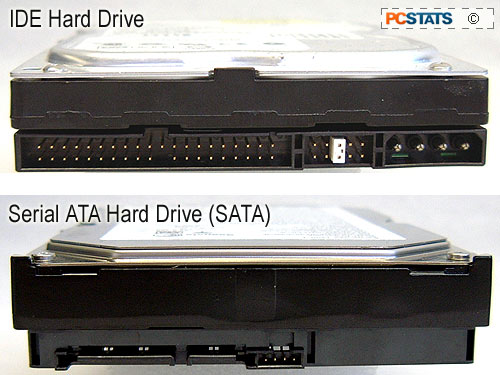
unit where the connections are. A parallel ATA, or IDE drive (still
the most common variety) will look like the drive immediately below. Note the 40-pin parallel ATA connector, jumpers,
and 4-pin molex power socket. The drive is 3.5" wide, and a little less than 1" thick.

Serial ATA hard drives are physically the same shape and size, and differ only in the type
of electrical connectors they require to interface with the motherboard. A Serial ATA drive is pictured directly above. Note the small,
flat, keyed power and Serial ATA connectors. Some serial ATA
drives also have a 4-pin molex power socket as IDE drive pictured
above, so yours may look slightly different from the Seagate SATA drive pictured here.

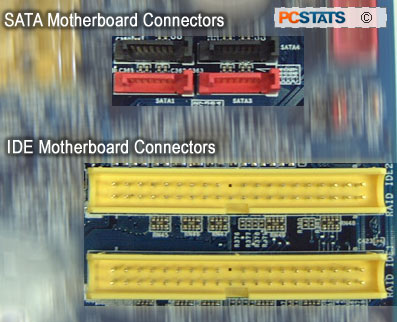
Recently purchased computer motherboards should have
both serial ATA and IDE connectors on board, but older boards will have only
IDE connectors. Once you've verified which type of hard disk you are using,
the next step is to power off your computer and open it up to ensure that you
have the necessary connectors free for the new hard drive.
Each SATA port can support a single SATA
drive, while each IDE connector can support two IDE hard drives or
optical drives (technically, this means a total of two IDE devices per channel).
IDE data cables have three connectors; one connects to the motherboard and
the other two attaching to the drives.
Now that you've figured out which type of hard disk you
are installing, we're going to start with the procedure for
installing an IDE hard disk first, then move onto installing a SATA
drive.

