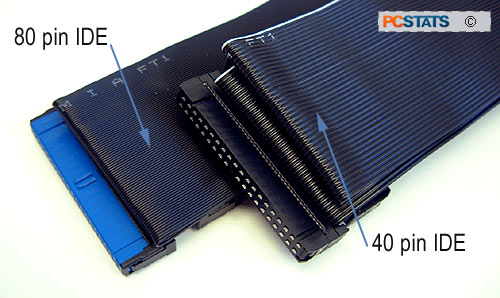
Modern IDE hard drives use an 80-pin UDMA cable, while
older hard disks and most optical drives use the 40-pin cable. If you are
installing a hard disk that was made within the last eight years, you'll want to
use the 80-pin cable. Note that the 80-pin and 40-pin names denote the number of
wires in each type of cable, though both types still physically connect to
the motherboard through a 40-pin connector.

Each IDE cable (both 40-pin and 80-pin
types) can support two IDE devices, either hard disks or optical drives or
a combination of the two. Depending on how your computer is currently configured, you may have an available space on an
IDE cable that you can attach your new drive to, or you may need
to add a second cable.
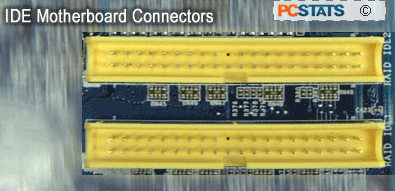
IDE cables connect to the motherboard through the IDE (Integrated Disk Electronics)
controller interface, which provides the means to transfer data to
and from the drives. An average PC will have a pair of IDE controllers, of various
colours, each represented by one 40-pin connector (see picture).

Power down your computer, look inside and locate
your existing hard drive and the IDE connectors on your motherboard to determine where you can add your
new hard disk. Remember that each cable supports two drives, and each connector on
the motherboard holds one cable.
Once you have figured out where you can attach your drive and whether you will
need a new cable to do it or not, it's time to prepare your
IDE hard drive for installation.

