With the drive connected, it is time to
confirm that the physical installation was done correctly. There are a couple
different ways to go about this, depending primarily on the operating system and
age of your PC.
With the new hard drive installed, reboot the computer
and watch the POST screen (the first screen you see upon restarting your
computer) for your new drive's model to flash up. If you installed a SATA drive,
it may appear on a different screen during the boot process also. If you see
your drive listed in the POST screen, we can move forward.
- OR -
If the hard drive is not listed, and the computer
has the Windows 2000 or Windows XP operating system, boot up the computer and
right click on 'my computer', choose 'manage.' In the management window, click
on 'disk management' and check in the lower pane of the disk management
window to see if the new drive is detected. If it is the second hard drive in
your computer, it will be listed as 'disk 1,' if it is the third, 'disk 2' etc.
It should appear as unallocated space.
If
you do not have WindowsXP/2000 installed and need to confirm that your new drive has
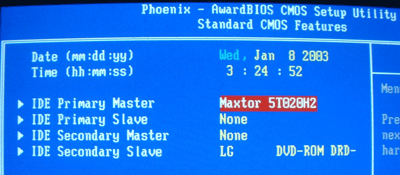
been installed correctly: Reboot the computer and press the DEL key at the POST screen to enter BIOS configuration.
Depending on your motherboard, either go to 'basic CMOS setup' or 'auto-detect
IDE devices' if this option is available. With either option, your new
drive should be visible in the position you installed it (i.e. Primary
master/slave, secondary master/slave).

If your drive is present and shows the correct amount of
space (I.E. ~80GB for an 80GB drive, etc.) you've installed it correctly
and we can move forward. If you still can't confirm the installation of your
drive, see the troubleshooting section on the very last page of this PCstats Guide. Next through, we tackle partitioning and formatting, which you'll need to do
before the drive is ready to store and read data.

