PCSTATS     
[X]   Directory of
Guides & Reviews

Beginners Guides
Motherboards by Brand
Weekly Newsletter
Archived Newsletters

+70 MORE Beginner GUIDES....
Beginners Guides: Repairing a Cracked / Broken Notebook LCD Screen
Beginners Guides: Repairing a Cracked / Broken Notebook LCD Screen - PCSTATS
A broken or cracked LCD screen makes a laptop utterly useless, good thing PCSTATS can show you how to replace that busted laptop screen with a minimum of fuss and for less money than a service center charges. PCSTATS will be fixing a cracked LCD screen on a Lenovo T530 ThinkPad notebook, the general procedures outlined here work for any notebook though.
Filed under: Beginners Guides Published:  Author: 
External Mfg. Website: Beginners Guides Aug 26 2018   Max Page  
Home > Reviews > Beginners Guides > Beginners Guides Beginners Guides

Step Four: Disassembling the Notebook Pg 3

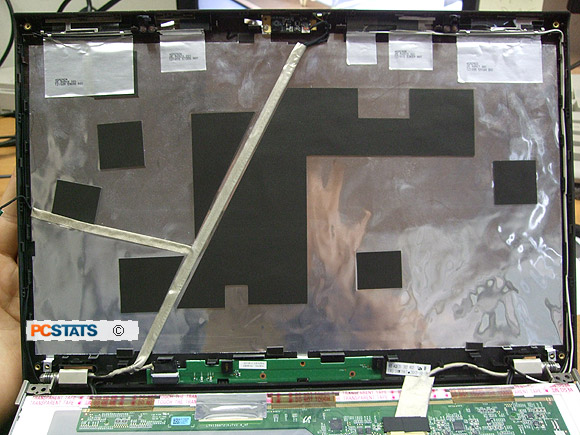
Looking behind the LCD screen panel we see the rear plastic screen bezel and all the associated cable harnesses and metal foil components. At the bottom right is the data cable running from the computer to the LCD screen panel. Around the outside of the rear plastic screen bezel are cables for the WiFi antenna's, a USB cable for the integrated web camera and reading light, and a cable running off to the screen closure sensor.

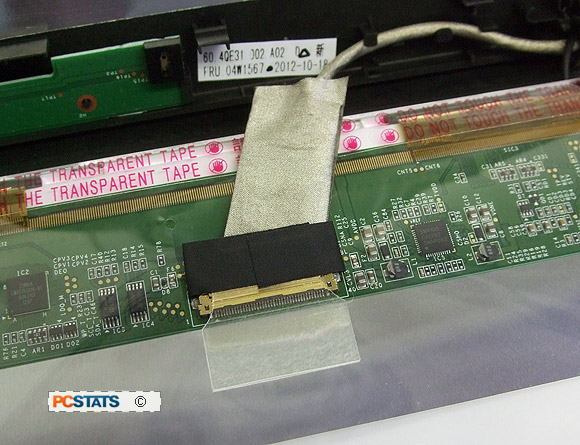
The back of the LCD screen panel looks like this. Aside from two screws along each edge which hold it in the metal frame, there is only a 40-pin data cable connection at the bottom left. This 15.6" LCD panel is made by Samsung, model: LTN156AT24.

The 40-pin data cable connection. We can't simply disconnect this cable though; Lenovo have applied two layers of tape to ensure the video cable never becomes disconnected inside the laptop. To disconnect the data cable, the tape has to be carefully removed first.

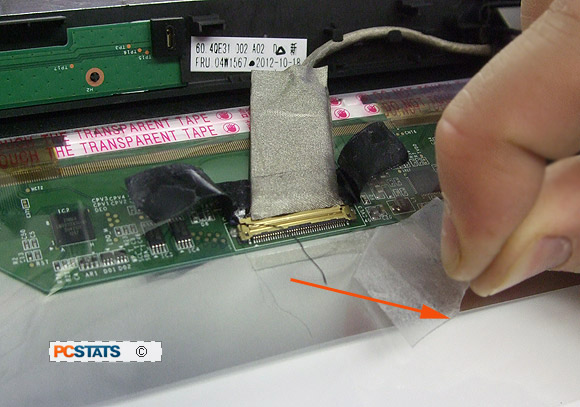
First, carefully peel back both ends of the black fiber tape. We'll need to reapply this tape so be careful not to damage it.

Next, we carefully peel back the layer of clear thick plastic which runs across the connection. We set this aside without damaging the adhesive backing.

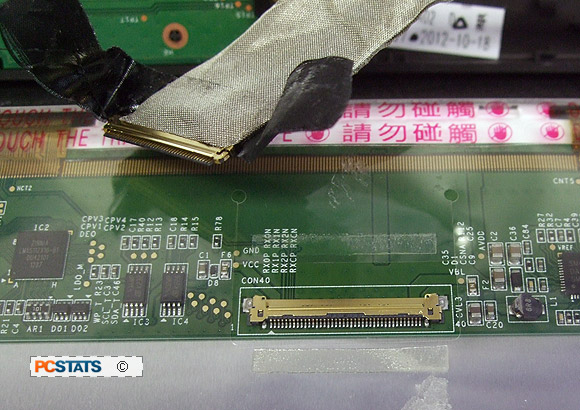
With the tapes removed, the 40-pin male data cable can be disengaged from the socket. This doesn't require much force, but do pull back in a straight line or you'll bend the thin metal tabs.

< Previous Page © 2023 PCSTATS.com
Please respect the time and effort that went into creating each PCSTATS Beginners Guide, do not illegally copy. Thank you.
Next Page >


Contents of Article: Beginners Guides Beginners Guides
 Pg 1.  Beginners Guides: Repairing a Cracked / Broken Notebook LCD Screen
 Pg 2.  Step Two: Answer the Four-point Technical Detail Checklist
 Pg 3.  Step Three: Buying a Replacement Notebook Screen
 Pg 4.  Step Four: Disassembling the Notebook Pg 2
 Pg 5.  Step Four: Disassembling the Notebook Pg 3
 Pg 6.  — Step Four: Disassembling the Notebook Pg 3
 Pg 7.  Step Four: Disassembling the Notebook Pg 4
 Pg 8.  Step Five: Installing the Replacement Screen
 Pg 9.  Step Five: Installing the Replacement Screen Pg 2
 Pg 10.  Step Five: Installing the Replacement Screen Pg 3
 Pg 11.  Step Five: Installing the Replacement Screen Pg 4
 Pg 12.  Other Reasons Why Laptop Screens Sometimes Go Dark

 
Hardware Sections 


PCSTATS Network Features Information About Us Contact
FrostyTech
PCSTATS Newsletter
Tech Glossary
Technology WebSite Listings
News Archives
(Review RSS Feed)
Site Map
PCstats Wallpaper
About Us
Privacy Policy
Advertise on PCSTATS

How's Our Driving?
© Copyright 1999-2023 www.pcstats.com All rights reserved. Privacy policy and Terms of Use.