Windows XP contains a built in
backup program that allows you to make data backups to a tape or hard drive. It
can be accessed at 'start/programs/accessories/system tools/backup.' Users of XP
Home must add the backup utility from the CD using add/remove programs from the
control panel.PCSTATS has already covered this feature in our XP backup
Guide here.
Files and setting transfer wizard
The
files and settings wizard is a new tool added to XP to allow users to transfer
their documents, email and desktop settings from other computers or other
Windows installations automatically.
It works with any Windows operating system from Windows 95
on, and requires some form of network connection if you wish to transfer
the data between computers. It works by transferring what it considers user specific data, such
as the contents of the desktop and the 'my documents' folder, to the new computer,
along with Windows settings for desktop themes, accessibility options, etc.
The
idea is to make your new computer's working environment identical to that of your old
one. It also will transfer the settings of certain popular third party programs like Photoshop,
provided the same application is installed on the new computer.

Note, the wizard will not adjust hardware
settings, so features like the desktop resolution and refresh rate will have to
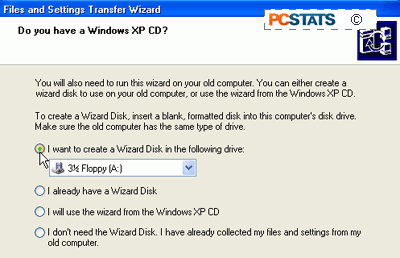
be changed manually. To use the files and settings transfer wizard, you will
need to first run it from the old computer, either by creating a floppy disk
(which can be done from within the wizard), or by inserting the Windows XP CD
into the old computer and running the wizard from there.
To transfer files and settings
from your old computer:
If your computer has a CD-ROM drive, the best way
to start the process is to insert your XP CD, select 'perform additional tasks' from
the autorun menu, then 'transfer files and settings' to launch the wizard.
If you do not have a CD-ROM on the old computer,
you will need to create a wizard disk by running the files and settings transfer
wizard, selecting 'new computer' then following the options to make a disk.

