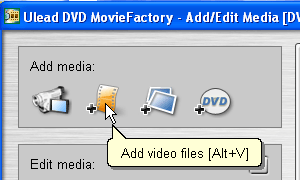
Click the 'add video files'
icon and locate the clip or clips that you wish to put on a DVD.

The clips will be added in
order to the navigation bar at the bottom of the screen. From here, you can
change their order (by clicking and dragging). The next order of business is to
add chapters to the clip or clips that you have selected, assuming that you want
to be able to scan through your newly created DVD like you can with a
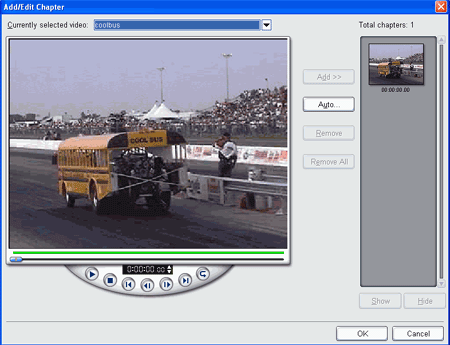
conventional one. Click the 'add/edit chapter' button to do this.

If you wish, you can manually
add chapter points by using the bar to scroll through the clip and then clicking
'add' where you want a new chapter. Otherwise, Click the 'auto'
button.

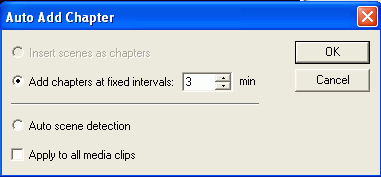
If the clip is longer than
three minutes, you will have the 'add chapters at fixed intervals' option as the
default. Change this to whichever time you desire and hit 'ok' and the program
will create chapters at each interval. Otherwise you can use the 'auto scene
detection' option which will detect any major scene change and insert a chapter
point. This can take a long time with bigger files, and the results will vary.
Once you are done adding chapters, click 'ok' to return to the first
screen.

