Once you have the scenes for
your clip(s) set to your liking, you can add transitions, music, text or stills
using the line of icons up the center of the screen. Now it's time to proceed to
the authoring screen by clicking 'author' at the top.

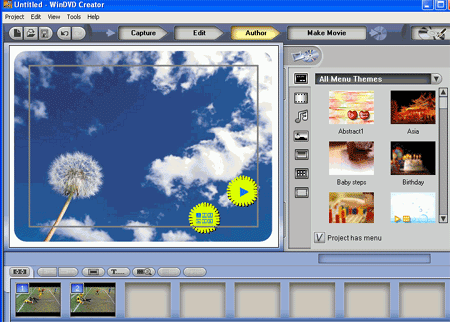
The authoring screen is
initially confusing, and is probably the weakest part of this package, even
though it contains more options than the other products we use in this article.
The icons along the right side allow you to change menu and button styles, add
music and background images and even an animated background. With the row of
buttons along the bottom, you can view what each page of the menu will look
like, add text, preview your DVD in a software player and choose the stills that
are used to represent each chapter.
Once you are satisfied with
the appearance of your DVD's menu, click 'make movie' to move on to the final
step of the DVD production process.

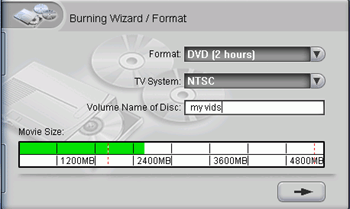
Here you can choose the format
and type (PAL or NTSC) of your disk, and give it a label. If you live in North
America, choose NTSC. Once you are satisfied, sit back as the program creates
your DVD file.

