45. Set a fixed paging file
size
If you want to optimize your Vista system's use of its
page file as much as possible, consider setting up a static paging file.
Normally, the operating system dynamically resizes the page file as it sees fit,
but this resizing operation imposes an overhead on page file operations as well
as being unpredictable in terms of the size it takes up on the disk. By setting
a static file size, Vista is relieved of the need to manage the paging file
which leads to more efficient operation.
To set a fixed paging file
size:
Click on the 'start' menu and right click on 'computer'.
Choose 'properties'.
In the left-hand pane, choose 'advanced system
settings'.
Click the 'advanced' tab, then under the 'performance'
heading choose 'settings...'
Choose the 'advanced' tab again, then under the 'virtual
memory' heading click 'change...'
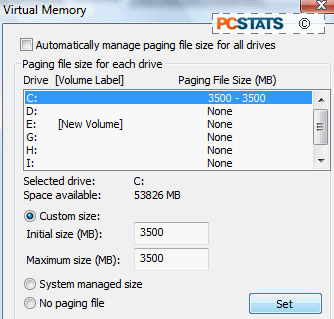
Uncheck 'automatically manage paging file size for all
drives' at the top.
Highlight the drive that contains your paging file.
Select the 'custom' size option below.
Now enter in an appropriate amount of space in the
minimum and maximum boxes. A good guideline would be 1.5 x the amount of
physical memory in your system, so set a 3GB page file for a system with 2GB of
system memory.
Click 'set' and 'ok'.
46. Rebuild the paging file
to optimize performance
If you have noticed that game performance has diminished
or that applications are loading slower than they once did on your Vista system,
you may want to give this tip a try. By default, Vista does not clear the
contents of the paging file (the area of the hard disk Vista reserves to act as
extra RAM memory). Over time it can become fragmented and less efficient. One
solution is to reset this file every so often, ensuring a fresh start for your
applications and games.
 To reset the Windows
Vista page file:
Click on the 'start' menu and right click on 'computer'.
Choose 'properties'.
In the left-hand pane, choose 'advanced system
settings'.
Click the 'advanced' tab, then under the 'performance'
heading choose 'settings...'
Choose the 'advanced' tab again, then under the 'virtual
memory' heading click 'change...'
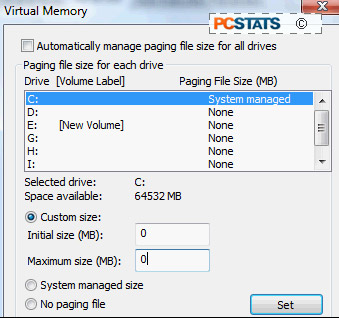
Uncheck 'automatically manage paging file size for all
drives' at the top.
Highlight the drive that contains your paging file.
Select the 'custom' size option below.
Change the minimum and maximum page file size to '0' and
click set.
Restart the computer.
Reopen the paging file properties window and highlight
the drive that contained your page file. Choose the 'system managed size' option
and click 'set'. Confirm the overwrite and click 'ok'.
47. Move
search index to another physical drive
Much like the paging file in Tip #44, you can move the
search index to a separate physical hard drive to save overhead on the system
drive and boost performance. Note that this tip does require rebuilding the
index file, so performance may slow initially until it reaches a useful size
again.
To move the search index to
another physical drive:
Open the 'start' menu and type 'index' in the search bar.
Hit Enter.
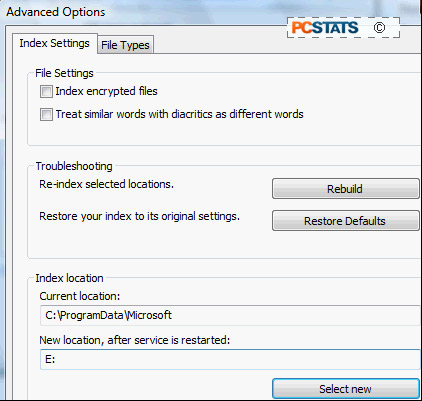
Click the 'advanced' button.

Click 'select new' at the bottom of the page. Choose a
new location on a different physical hard drive.
Hit 'ok'.

